 Frete Grátis em todos os produtos
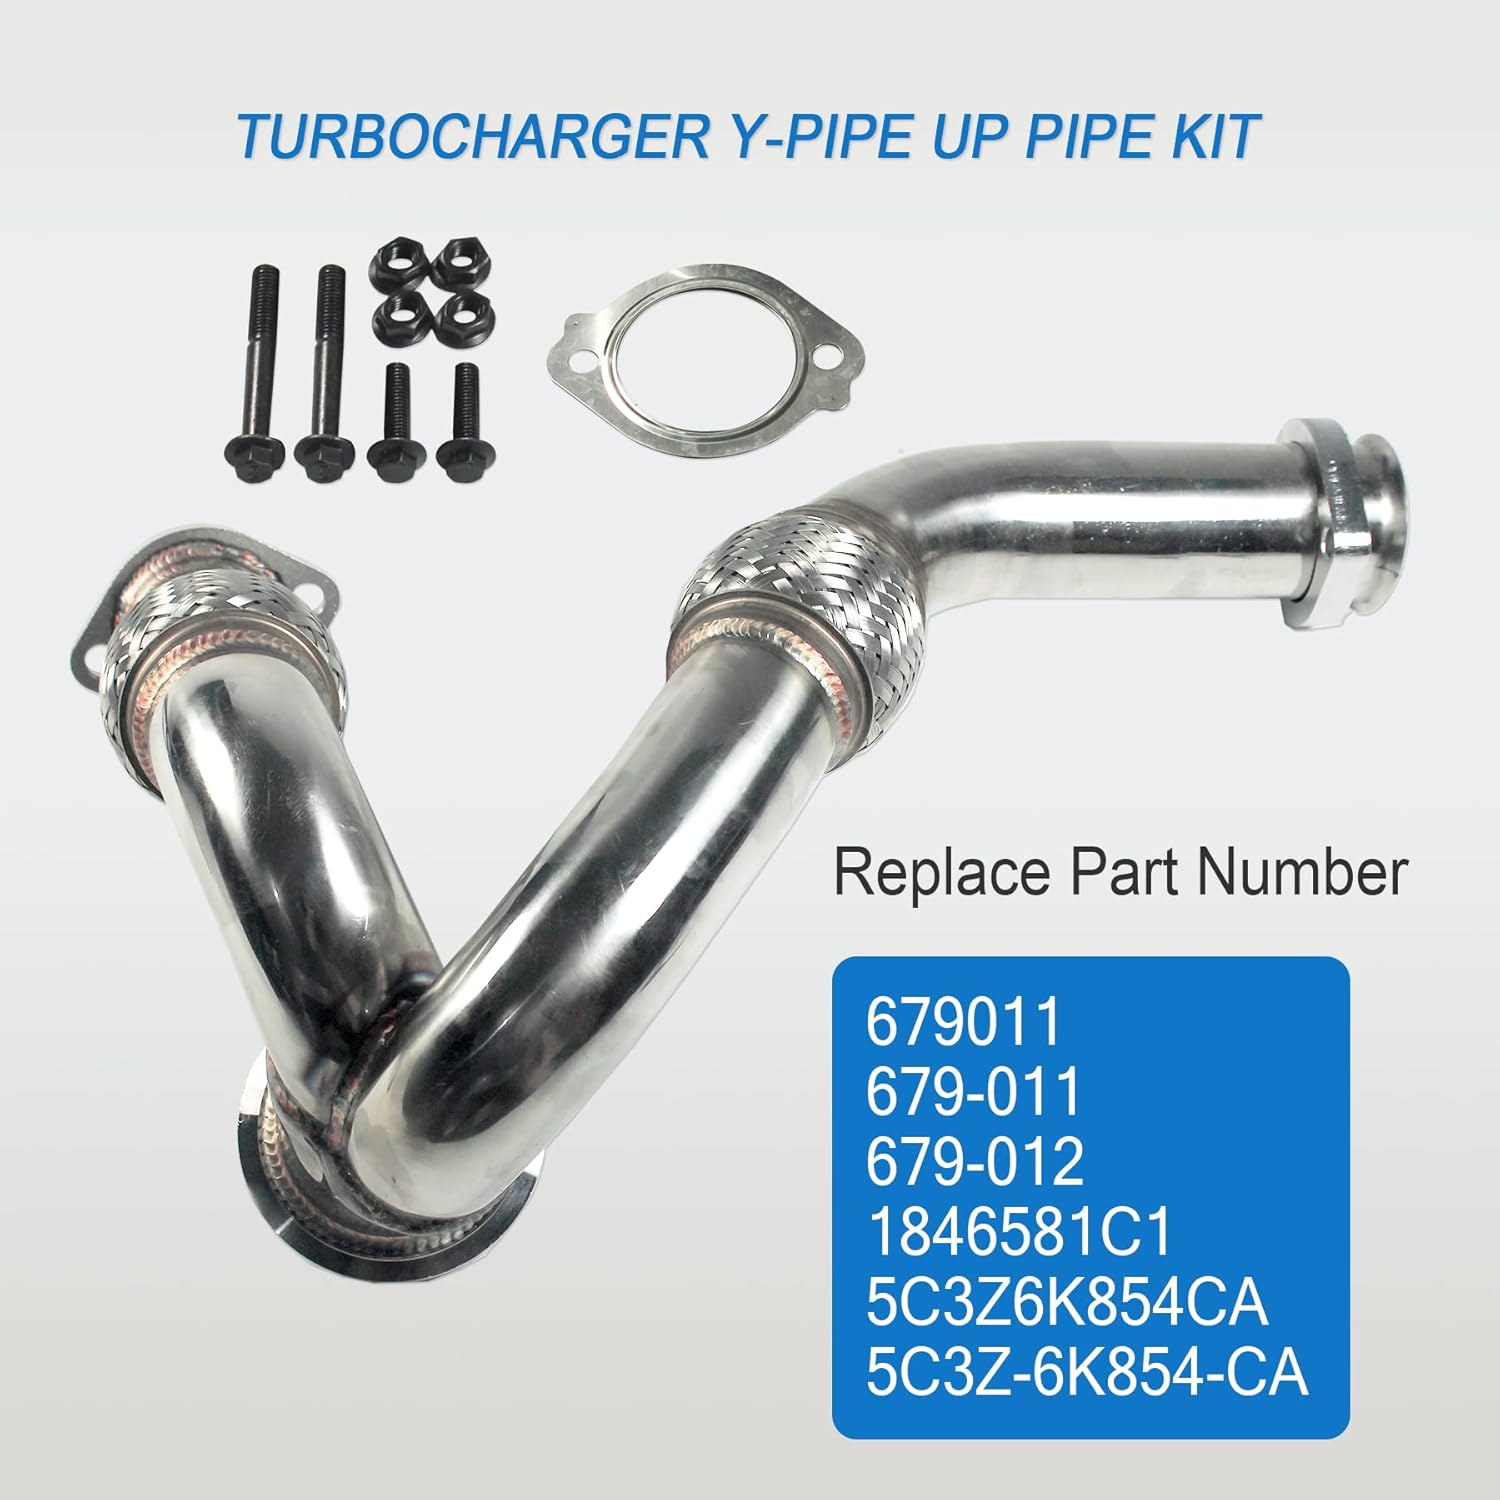
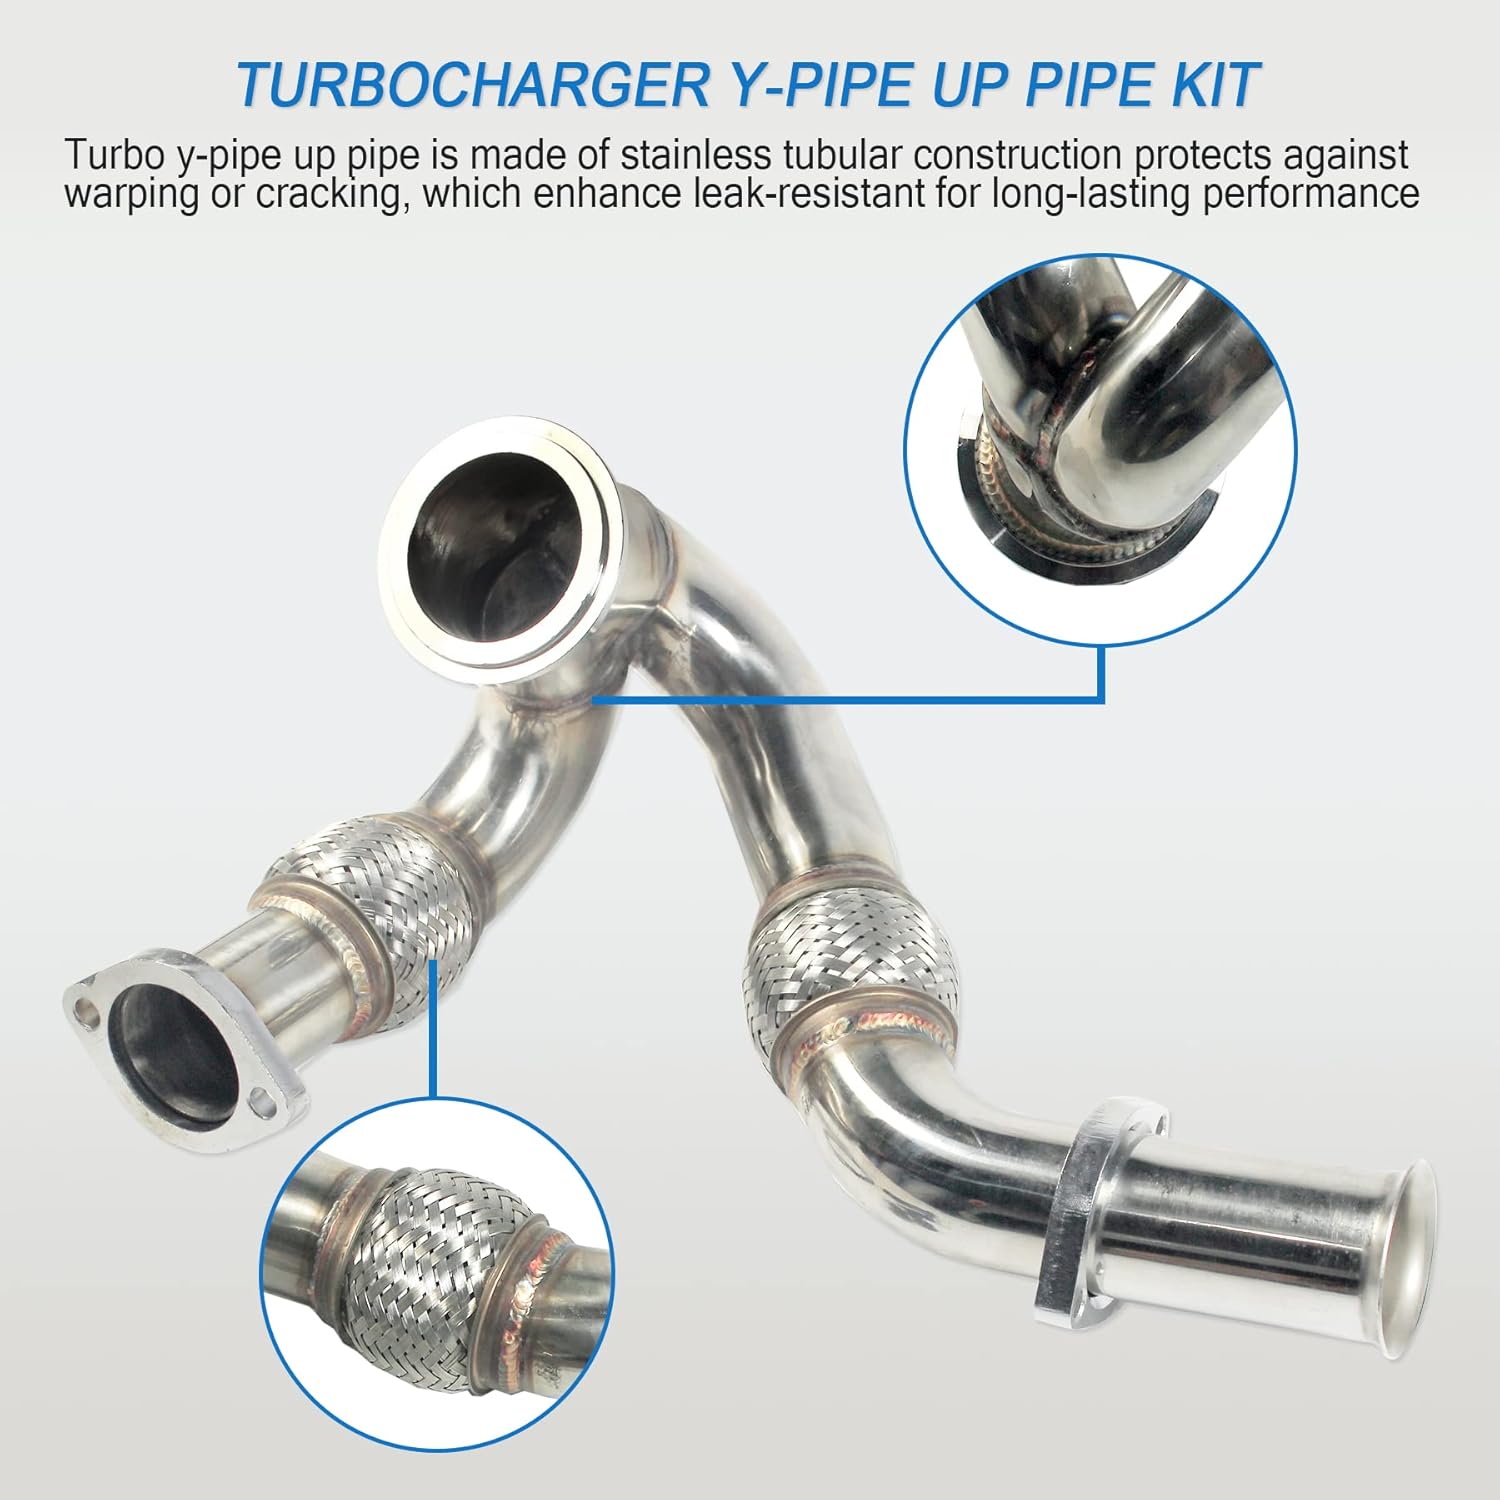
- Precise construction for long-lasting performance; Stainless tubular construction protects against warping or cracking
- A rigorous quality inspection has been undertaken to ensure high quality
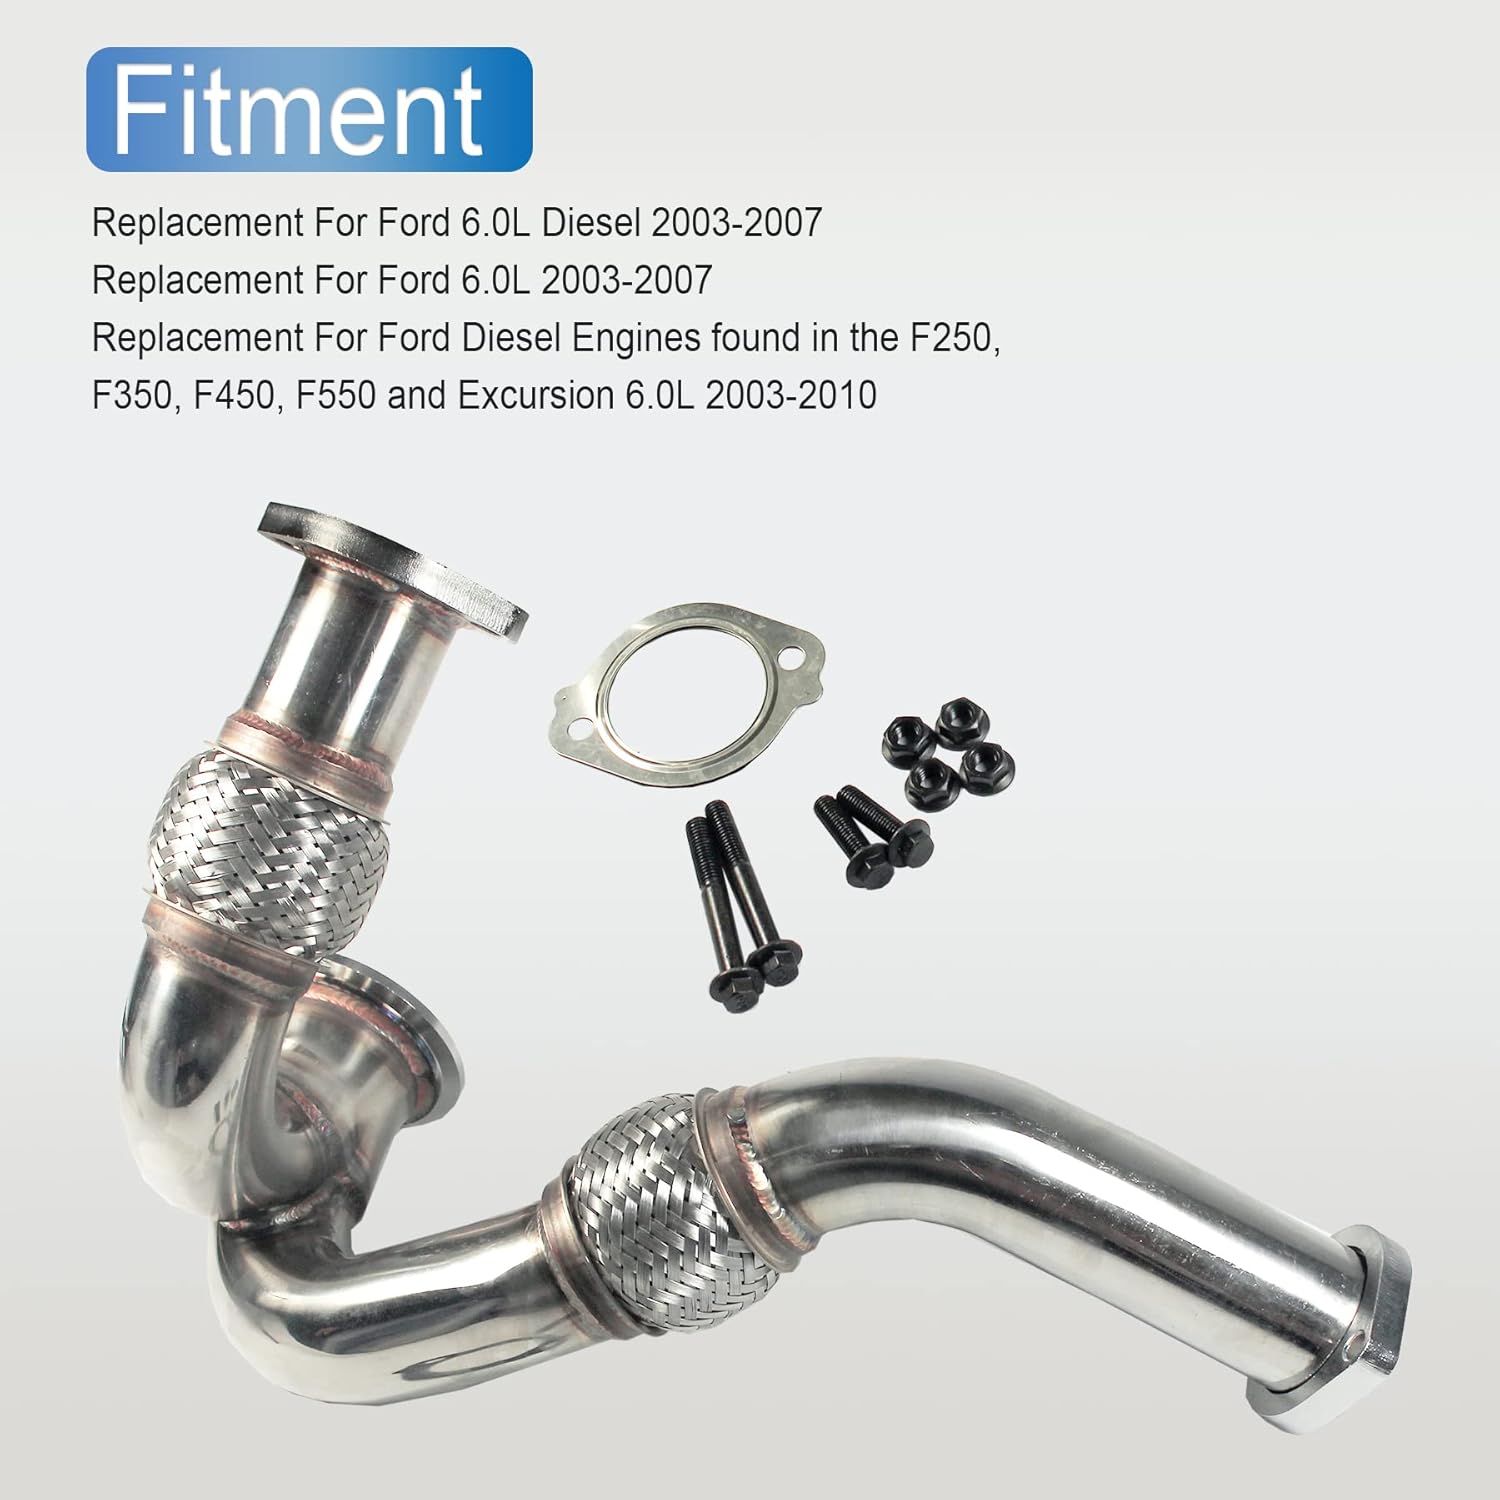
- Package Includes: 1 x set turbochargers up pipe kit, all necessary hardware, bolts, and gaskets
- Replacement For 679011 Turbo Pipe Kit, Replace Part Number: 679-011, 679-012, 5C3Z6K854CA, 5C3Z-6K854-CA, 5C3Z 6K854-CA, 1846581C1
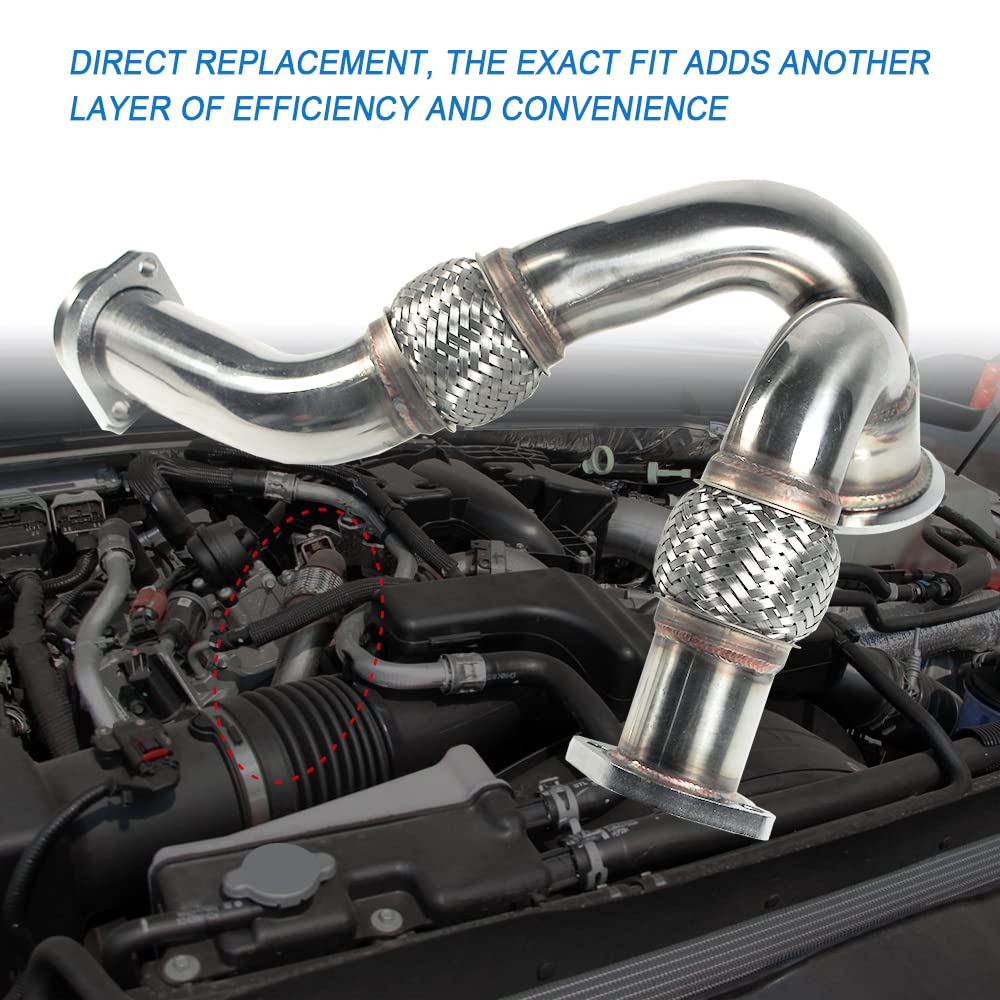
- Replacement For Ford Super Duty Excursion 6.0L V8 LH Driver Side Turbocharger Inlet Pipe; Replacement For Ford Diesel Engines found in the F250 F350 F450 F550 and Excursion 6.0L 2003-2010; Replacement For Ford 6.0L Power-stroke Diesel 2003-2007; Replacement For Ford 6.0L Power-stroke 2003-2007


 SBC/BBC Solid Steel Motor Mount Engine Bracket Kit for Chevy V8 283 327 350 400 Small & Big Block Chevy Engines Off Road Racing
*$493.00
SBC/BBC Solid Steel Motor Mount Engine Bracket Kit for Chevy V8 283 327 350 400 Small & Big Block Chevy Engines Off Road Racing
*$493.00
 Pair Engine Timing Cover Compatible With 1999-2011 Subaru Impreza Forester Inner Left & Outer Right 13574AA081 13575AA112
*$709.00
Pair Engine Timing Cover Compatible With 1999-2011 Subaru Impreza Forester Inner Left & Outer Right 13574AA081 13575AA112
*$709.00
Frete Grátis em todo o BrasilProduto Original Importado dos EUA
JDMSPEED New Turbocharger Y-Pipe Up Pipe Kit With Gasket Replacement For Ford 6.0L Diesel 2003-2007 Replaces# 5C3Z6K854CA 679-011 679-012 1846581C1
*$1,069.00
Informação adicional
| Manufacturer | JDMSPEED |
|---|---|
| Brand | JDMSPEED |
| Item Weight | 5.55 pounds |
| Product Dimensions | 17.72 x 6.3 x 11.02 inches |
| Country of Origin | China |
| Is Discontinued By Manufacturer | No |
| Exterior | Painted |
| Manufacturer Part Number | 679-011 |
| OEM Part Number | 1846581C1, 5C3Z 6K854-CA, 5C3Z6K854CA, 5C3Z-6K854-CA, 679-011, 679-012 |
| Hollander Number | 679-011 |
| Date First Available | June 20, 2017 |


Tasha –
Parfait pour Ford lariat 2006 avec 6 litres diesel
Bryce –
Work perfect. No issues with fitment or installation. Actually has better air flow, less turbulent air, that the Ford factory units. I do recommend wrapping these with exhaust heat wrap before installation as you will loose a couple heat shields that are on the factory unit. Small price to pay when faced with over $400 from the dealer for just the uppipe no hardware. Feel confident when purchasing this it works great
Irvin Casildo –
Difícil de poner pero si es la medida
RMK –
When replacing this y pipe exhaust with your old oem, this is the route I went. Disconnect the y pipe end from the driver side manifold and then you egr delete pipe or stock egr pipe from the passenger side manifold. Once pipes are disconnfeted the entire assembly will pull out together with some maneuvering. At this point disconnect the egr pipe from the old y pipe and attach the new. Same as coming out put the entire assembly back in but do not tighten any bolts up yet. Now attach the y pipe collector to the turbo to ensure a proper seal. Clamp ends should be almost be touching when a proper seal is acquired. Once y pipe clamp is tightened, sit turbo in the pedestal and all piping should line up perfectly. So far I haven’t had any issues with leaks so only time will tell how it holds up but looks to be nice quality
Jon P –
It went right in and lined up fairly nicely. Just like the original, but with better flex joints. I would have give them 5 stars if they would have included the bolts for both sides at the manifolds since you need to at least loosen them to make thing line up, but it is easier to take the whole thing out and then swap the up pipe.
Irvin Casildo –
I was doing my head gaskets and my truck which has 200,000 miles on it so I figured I’d replace my OEM up pipe while I was in there. The OEM pipe wasn’t leaking just changing it due to mileage. I had all the connections loose and this pipe still wouldn’t line up so I had to use two ratchet straps to get into place. Secondly there are no heat shields so you have to wrap with header wrap or fab up a bracket and use the heat shield from the old pipe which is the way I did it. Fired up the truck and it leaked, even tried re positioning it which still didn’t correct it. So I ended up having to take the turbo out and replace with an OEM up pipe. Ended up just trowing this pipe in the garbage. The quality of this pipe seems really good but just not the correct angles for it to line up everything correctly.
Brandon Dupuis –
I was on the fence ordering these because of fitment issues. I’m super pleased with my purchase and the welds are beautiful. The trick is to loosely fit both sides of the up pipes to each manifold. You should have about 1/4 of an inch of slack on each bolt. Next put your turbo back in and loosely mount it to the pedestal. Now you should be able to move the up pipe to the inlet of the turbo. I was able to push up and forward about 1/2 an inch to seat the up pipe. Put your clamp then secure your four bolts on the manifold connection. The worst part of it all was removing the old rusted bolt on the driver side, closest to the firewall.
Hope this helps anyone that doesn’t want to pay for $200+ set.
Dawn G. –
I was very satisfied with the look and fit of this down pipe! Just loosen both exhaust manifold flanges and it’ll bolt right up! Excellent part for the price.
Kassidy –
I was on the fence about getting this, but if you do it right, it should go together quite nicely. Just don’t tighten things up before you have everything lined up put the manifold bolts in first and and keep them loose and move back up to the top put your top clamps on tighten those then go back down under the truck tighten your manifold bolts together super easy again if it’s done right now I will see how long it lasts
Mario houle –
Overall this is a good product. Fitment was a bit of a challenge with the turbo. But the finish and welds are great.
Make sure to leave the manifold/EGR pipe bolts very loose while fitting up the flange to the turbo, and make sure that flange drops into place.
Would buy again.