 Frete Grátis em todos os produtos


### Descrição do Produto
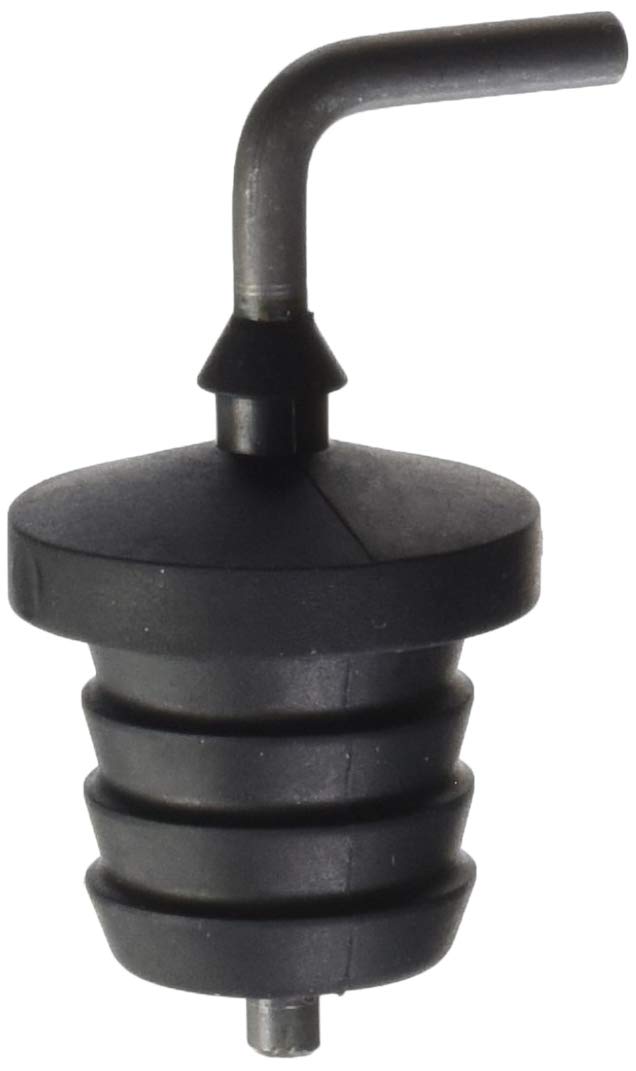
O Genuine Honda 25615-5T0-004 Filler (ATF) (A) (Continuously Variable Transmission) Cap é um componente vital para a manutenção do sistema de transmissão continuamente variável (CVT) dos veículos Honda. Este tampão de enchimento foi projetado com precisão para assegurar a integridade do fluido de transmissão automática, oferecendo um vedamento eficaz que previne vazamentos e contaminação do fluido. Com uma construção robusta e materiais de alta qualidade, o tampão Genuine Honda se destaca como a escolha ideal para quem busca durabilidade e desempenho superior.
A instalação deste tampão é simples e direta, permitindo que os proprietários de veículos Honda realizem a manutenção de forma prática e eficiente. O design do produto foi desenvolvido para se encaixar perfeitamente nas especificações dos modelos Honda, garantindo que o fluido de transmissão permaneça em níveis adequados e que o sistema funcione de maneira otimizada. A utilização de peças genuínas, como o tampão 25615-5T0-004, é fundamental para preservar a garantia do veículo e evitar problemas futuros relacionados à transmissão.
### Instruções de Uso:
Para utilizar o Genuine Honda 25615-5T0-004 Filler (ATF) (A) (Continuously Variable Transmission) Cap, siga os passos abaixo:
1. Preparação: Certifique-se de que o veículo esteja em uma superfície plana e que o motor esteja desligado e frio.
2. Localização: Identifique o local do tampão de enchimento da transmissão CVT, que geralmente está localizado na parte superior da transmissão.
3. Remoção do Tampão Antigo: Com cuidado, remova o tampão antigo, utilizando uma chave apropriada, se necessário.
4. Inspeção: Verifique se há resíduos ou contaminação na área de enchimento. Limpe a área ao redor para evitar a entrada de sujeira.
5. Instalação do Novo Tampão: Coloque o Genuine Honda 25615-5T0-004 no local, certificando-se de que esteja bem ajustado e vedado.
6. Verificação Final: Após a instalação, verifique se não há vazamentos e se o tampão está firmemente posicionado.
### Características do Produto
– Compatibilidade: Projetado especificamente para veículos Honda com transmissão CVT, garantindo um encaixe perfeito.
– Material de Alta Qualidade: Fabricado com materiais resistentes a altas temperaturas e pressão, aumentando a durabilidade do produto.
– Vedação Eficiente: O design do tampão proporciona uma vedação superior, prevenindo vazamentos de fluido de transmissão.
– Fácil Instalação: O tampão é projetado para uma instalação simples, sem necessidade de ferramentas especiais.
– Peça Genuína: Como um produto genuíno Honda, garante a qualidade e a confiabilidade que os proprietários de veículos Honda esperam.
### Perguntas Frequentes (FAQ)
Pergunta: O tampão 25615-5T0-004 é compatível com todos os modelos Honda?
Resposta: Não, este tampão é projetado especificamente para modelos Honda com transmissão continuamente variável (CVT). É importante verificar a compatibilidade com o seu modelo específico.
Pergunta: Como posso saber se o meu tampão de enchimento está com vazamento?
Resposta: Verifique a área ao redor do tampão para sinais de fluido de transmissão. Se notar manchas ou acúmulo de fluido, pode ser um indicativo de que o tampão não está vedando corretamente.
Pergunta: Posso usar um tampão de enchimento de outra marca?
Resposta: Embora seja possível, não é recomendado. O uso de peças genuínas, como o tampão Honda, garante a melhor performance e evita problemas futuros.
Pergunta: Com que frequência devo verificar o tampão de enchimento da transmissão?
Resposta: É aconselhável verificar o tampão durante as trocas de óleo ou a cada 10.000 km, ou conforme recomendado no manual do proprietário do veículo.
Pergunta: O que devo fazer se o tampão não estiver se encaixando corretamente?
Resposta: Se o tampão não estiver se encaixando corretamente, verifique se há sujeira ou danos na rosca. Se necessário, consulte um mecânico para avaliação.


John Klopp –
Es el correcto, y coincide con la descripción del producto, quedo perfecto
J –
EDIT: It’s now March 2025, I replaced this in April 2024, I’ve been repeatedly cleaning the vent cap and the new plug has never popped out since, I expect it not to but who knows.
(I made a diagram attached to this review that shows the location of all of the stuff, there’s also a section at the bottom for a potentially CVT-destroying problem you should check)
I’ve owned five Hondas, two with the same CVT, I have heard stories about the dipstick popping out (not really a “dipstick” on the CVTs) years ago, such that I would often check it out of paranoia but never experienced it popping out… until the other day. It was quite a shock seeing it since I wasn’t sure how long it was like that, I know the maximum length of time, since I keep records of when I do all service and the last time I did a CVT drain and fill I definitely did not see that, so at worst it could have been since then to the day I found it. The car is no longer mine I gave it to my mom so I only get to check it every once in a while.
After some choice expletives, I checked the vent cap and sure enough it was completely blocked, cleaned out the vent cap with a pick and brake cleaner, did a CVT drain and fill a few times and replaced this plug. This new plug fits way more firmly into the slot, you have to actually pull on it to remove it, the one that came with the CVT is completely loose, it basically floats in place and can be lifted out with your pinky and zero effort.
If you buy this you MUST clean out the vent cap before using this and keep cleaning it every once in a while. I clean it out by taking the vent cap off, turning it upside down and shooting brake cleaner through it and using a shop towel to clean it up, I do this every time I check the oil and tire pressures. The transmission must be properly vented through the vent cap, the fluid/oil expands in volume as it heats up. Let’s say you have 4 quarts of fluid in the case and 6 quarts of air above it, if the 4 quarts of fluid expands to 6 quarts, the case must be vented to allow 2 quarts of air to be released or it must hold 6 quarts of air compressed. The air will always seek a way out to relieve the pressure before compressing, it will find the path of least resistance to relieve the pressure, either by popping out this plug, the vent cap, or an oil seal. In my case the plug was looser than all other options so it pushed that out instead, lucky me.
When re-installing the vent cap onto the vent pipe, the cap has an arrow indicating it should point to the front of the car, I rotated it a little more than 90 degrees, so the opening is facing to the side and slightly toward the back, to prevent dust from flying directly into it from the front through the radiator and condenser. I did this because the clog appeared to be a mixture of CVT oil vapor caked with dirt.
I wasted several expensive quarts of HCF-2 on this. Shout out to Honda for a terrible design and never doing a recall for this but issuing a TSB acknowledging the issue instead… that nobody finds out about until after the fact…
⚠️ WARNING ⚠️: If you own a 9th Civic (2012-2015) with a CVT (some say the 10th as well but far less commonly), there’s a far more serious issue that Honda has also never addressed: the fluid pressure sensor that threads into the driver side of the CVT case loosens, all of the CVT fluid is pumped out through the gap between the threads. Google or check YouTube for “cvt pressure sensor leak civic”. Likely they were under torqued at the factory, but you should check and tighten it before it happens. Some report it loose enough to spin with their fingers by the time it’s already pumped everything out and they notice.
You can check and tighten this easily and quickly (took me about ten minutes), saving yourself potentially thousands of dollars in repair bills by following these instructions:
1. Remove the driver side front wheel.
2. Remove two push pin clips on a plastic splash shield (see my picture), it looks like a rectangle behind the rotor and to the left slightly at the back of the wheel well. Remove the push pin clips using a push pin tool or a flat head screwdriver to pop the center push pin up, do this slowly and do it evenly by moving the screwdriver to multiple sides or you’ll break the push pin. Road debris, dirt, sand gets jammed in the push pin so you need to alternate to get the push pin up.
3. Bend the plastic flap down, let it catch on the lower control arm to keep it held down or use the holes the push pins were in with some bungee cord to hold the flap down.
4. Unplug the wire harness from the sensor, put a 27mm box-end wrench on the sensor hex and tighten, VERY IMPORTANT you do this carefully (see the diagram and notes at bottom).
5. When done, before putting everything back start the car then check if the sensor is leaking. If all good shut the car off, then do the reverse of these steps to button it back up. To get the push pin clips back in, pull the center push pin out enough that the “legs” on the push pin clips can compress enough to fit into the hole, be gentle when compressing the legs or they’ll snap, they become very brittle over time. Once the clip is fully inserted push the pin in. You may want to just replace them, you can get aftermarket ones anywhere like Harbor Freight (PITTSBURGH Automotive Plastic Fastener Kit, 240 Piece), Amazon, eBay, etc.
Our Civic is a 2015 with about 70k miles, I checked and tightened the sensor in March 2025, at the time I checked the sensor it was still tight (hadn’t loosened on its own) and there was no leak. Given that after 10 years it wasn’t already leaking, now that I’ve tightened it I suspect it will never leak, but I’ll check every year just in case.
NOTES:
* Use a 12-point box-end wrench, you’re not going to be able to get a 6-point wrench on the sensor hex without something in the way, you need the additional angles, ratcheting not necessary unless the sensor is already loose and you need to tighten it significantly, flex-head is not necessary the sensor is accessible with the wrench straight.
* Unless you lower your head and look up (or you’re laying on the ground) you won’t be able to see the sensor dead on because part of the chassis is in the way (the part of the chassis the splash shield push pins go into), but it’s very accessible and visible, only about 2 inches past the chassis, you’re going to have to stick your hand up in there but definitely not your whole arm.
* The wire harness connector unplugs like every other: squeeze the tab, pull connector off while squeezing tab in, do not use a tool to do this you’ll break the connector, just stick your hand up there and feel for the tab.
* BE GENTLE: if you smash the wrench into the plastic connector portion of the sensor you can break it off, put your fingers from one hand on the plastic portion first, guide your wrench to your fingers with your other hand, then slide the wrench onto the sensor once you know where it is, don’t lead with your wrench, hit it and break it.
* DON’T OVERTIGHTEN THE SENSOR: even though it has a crush washer you can easily strip the aluminum threads on the CVT case if you have no idea what you’re doing. If you’ve ever seen an oil pressure sensor the hex is 27mm but the diameter of the threaded shank is not 27mm it’s significantly thinner (about 9mm or so, even thinner than the oil drain plug, see the diagram), the threads are fine/tiny. If it’s not already leaking or finger-loose, tighten no more than a HAIR (or 15 degrees, which would be from 12 half way to 1 on a clock). You’re just making sure it doesn’t loosen in the future. I can’t stress this enough because there’s going to be some fool who goes nuts on this and strips the threads. The average 27mm wrench is going to be about 12-14″ long, if you have your hand all the way at the other end of the wrench you’re not going to feel any tightness due to the leverage it gives so don’t count on that, know when to stop ahead of time NOT BY FEEL, no more than 15 degrees!
* Whether it was leaking or not hit where the sensor meets the case with some brake cleaner (avoid the plastic connector) just to clean the area of any dirt and oil residue, so if it ever leaks in the future you know it’s new and not some old leak. If it was already leaking though, definitely clean all of the oil with brake cleaner.
* You should probably monitor this for a leak every year or two, but this problem may be due to undertightening at the factory so you may only ever have to do this once. My sensor had a Denso imprint on the flat of the hex that I used as an “indexing” mark so I know where the sensor was rotated/tightened to. If you can’t use something like that on yours you may want to use a paint or grease marker, make a line on the sensor hex and a matching line on the CVT case so they line up, if the two don’t line up in the future you know the sensor rotated, this is optional though.
* Don’t put anything on the threads! Unless it’s fully loose you shouldn’t even unloosen it. Don’t use sealant (RTV, HondaBond, etc), thread locker, or teflon tape. The sensor never used any of these from the factory and the issue is likely due to being under torqued anyway. Anything extra you put on the threads has a chance of ending up in the oil passages, then making it to the valve body. The valve body consists of dozens of small passages, some using spring-loaded ball bearings to route fluid, jamming one of these passages or wedging debris between a ball bearing and its aperture will ruin the transmission and require it be torn down, you’ve been warned.
alec –
Apparently these can get oil and dirt in the air breather port allowing for some back pressure in the transmission and causing this part to pop out. Sometimes they don’t fall very far from where they plug in, but as was our case, must’ve popped out and bounced out of the engine bay at some point. I put this new one in and it fit nicely , not too loose, not too tight. I eventually found the old one lying in the grass next to where the car parks and sure enough, the breather hole in it was clogged with oily, greasy dirt. I checked to see how the fitment for the old plug was and it seemed a bit loose, not as snug as this new one. I cleaned it out and stowed it away for safe keeping, in case the new one pops out and goes missing.
Liliana Martínez Cobos –
Exactly what I needed.
J –
Exact fit. 2021 LX 2.0 Civic
Fernando Dos Santos –
As described by seller fits perfectly!
Akapop Sripakdee –
For those who are not sure if it would fit yours. It’s a genuine Honda part.
jake –
Replaced my loosey goosey 10th gen plug. This is much tighter and won’t pop out. Btw clean your breather cap or it will still pop out regardless.
Rene Zuniga –
Haven’t driven any miles with this yet so I don’t know for sure if it will pop out or not. When I replaced the original plug with this though, the original was much looser, likely because of all the heat warping it over time. Checked the breather vent and it was all clean, hopefully this cap stops popping out, it fits much more snug. As other reviews have said already, make sure you clean the breather vent cap as well or else the plug will continue to pop out due to the pressure.
It’s a genuine Honda part as well- it came in a Honda bag and everything.
trees –
Fits perfect in my 2018 Honda hrv. Stayed in place.