 Frete Grátis em todos os produtos
- ?OEM?:OEM 09G, Please check the part number before purchasing replacements, Please make sure that you are ordering the correct auto part for your vehicle. If your not sure or don’t know, please contact us. Provide us with the VIN#, YEAR, MAKE, MODEL of your vehicle and we will double check and verify fitment for you;
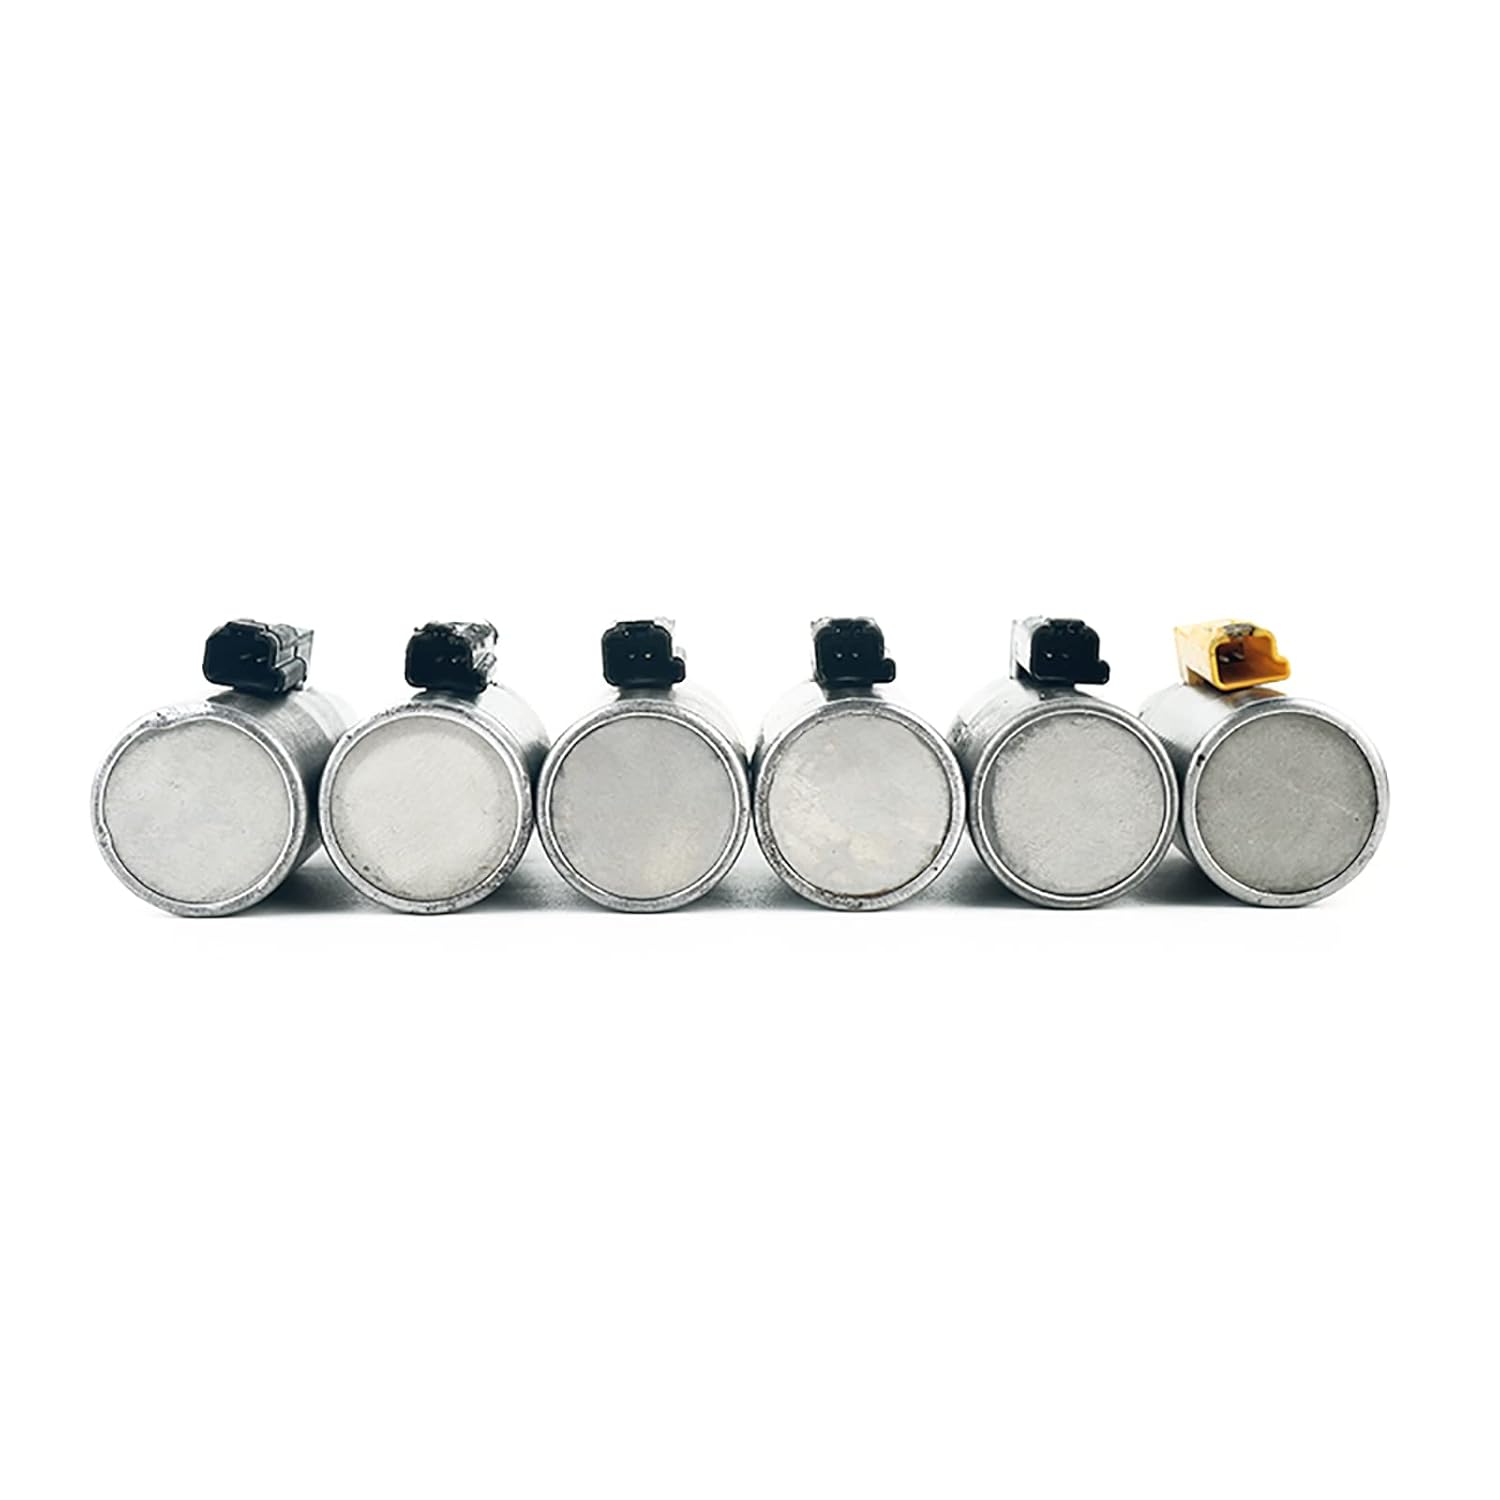
- ?Compatible?:SKO*DA:SUPERB 09-11 (CHN) L4 2.0L V6 3.2L 6-Speed FWD, Volksw*agen:Beatles 03-10 1.8L 1.9L 2.0L 2.5L 6-Speed FWD;G*olf 07-11 2.0L 6-Speed FWD;Jet*ta 05-11 2.0L L5 2.5L 6-Speed FWD;PAS*SAT 05-09 2.0L V6 3.6L 6-Speed FWD;TOU*RAN 03-06 1.6L 1.9L 6-Speed FWD?MINI:MINI 05-11 L4 1.6L 6-Speed FWD;For SA*AB:9-3 09-11 L4 2.0L 6-Speed FWD?Au*di :TT 03-06 1.8L 6-Speed FWD/AWD;
- ?Premium Quality?:100% new and high quality for long-lasting durability, engineered from high-quality materials to improve the reliability and durability;
- ?Installation ?:Searching related installation video on the internet will be recommended and always wear eye protection and start with installation tools;
- ?1 Year Warranty?: Order this Trans Solenoid from us , we offer 1 year warranty, true worry-free shopping experience, if you get any problems with our these Trans Solenoid, please contact us in the first time.


 Transgo (48-PLT-01) Plate, 4L80E Valve Body, (Transgo) Tempered Steel
*$526.10
Transgo (48-PLT-01) Plate, 4L80E Valve Body, (Transgo) Tempered Steel
*$526.10
 3/4" DD X 3/4" DD Polished Steering U-Joint connecting 3/4 DD to 3/4 DD Shaft
*$417.20
3/4" DD X 3/4" DD Polished Steering U-Joint connecting 3/4 DD to 3/4 DD Shaft
*$417.20
Frete Grátis em todo o BrasilProduto Original Importado dos EUA
6-speed Trans Solenoid set 8 pcs For VW Audi Mini 2003-On 09G TF-60SN/TF60SN
*$1,103.20
Informação adicional
| Manufacturer | wowauto |
|---|---|
| Brand | WOWAUTO |
| Item Weight | 2.54 pounds |
| Package Dimensions | 5.12 x 4.88 x 3.86 inches |
| Manufacturer Part Number | 09G 8pcs |
| Date First Available | August 2, 2022 |


Steve DeStefano –
Items are supposed to be 100% New, at least the ad says that. Not true, used items! They are just repackaged.
Durwin –
I have purchased this product several times to repair different beetle transmissions.
Gnrtt –
Was cheaper than replacing the whole valve body and fixed issue of hard and late shifts when warmed up (which would make the vehicle go into limp mode). Pretty straight forward installation once you remove the valve body, but just keep track of everything (especially the wiring). I would recommend watching a handful of videos beforehand and less of the bolts with the 10mm head need to be removed to detach the valve body than some videos show – I did mine a couple of weeks ago but off the top of my head there was only 2 bolts on each end and maybe 3 on each side (none of the center bolts need to come out). Couple of notes, not sure if it matters but one of the solenoids has a marking on the end with a symbol instead of the 50 identifier, just make sure that one goes in in the same spot. Also the one on the end was a bit tight to remove and even more stubborn to re-install (I had to use large slip joint pliers with a washer on the end to not damage it and slowly pressed into place. Then you must twist it back in forth by using a wrench on the end to get the pin in place. Took off one star because one of the smaller solenoids I got in the kit was defective, at least electrically speaking (they’re supposed to read 11 or 12 ohms from the pin to the casing and the larger ones need to read 5 or 6 ohms). Just used one of the old ones in that location. There’s an hour and half long video on YouTube of a guy doing a whole rebuild of the valve body and grinds off the ends of the solenoids to rheem out the insides. Obviously you don’t need to go that far in depth but he shows you how the retainers come out for the solenoids. Take loads of pictures and you should be fine (especially the routing of the wiring like I said before). Good luck and if this works for you, you’ll save a ton of money.